 For the past few months I have been diapering Maddy with flats folded with the origami fold and a diaper cover, but I am getting tired of folding them every day. I have been selling contour diapers for awhile and had planned to make a bunch for myself, but I broke down and bought a snap press for my birthday and set about finding the perfect way to make fitteds and AIOs. I don't like having my seams show, so I set about hiding them by adding the fancy feature of a pocket and I don't like having to try to line up fabrics that are shift by nature, so I decided to solve that by trimming everything after the fact. Below is what I have discovered.
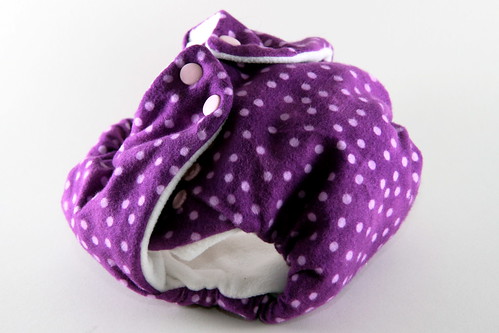
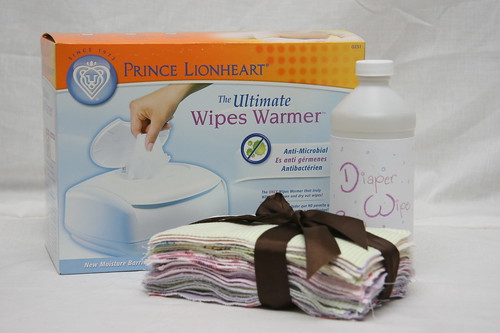
Don't forget, if you don't have the time or inclination to make them yourself you can by them at http://www.lazydayartifacts.com/
Materials:
These pictures are for a diaper I was selling, so they use new fabrics, but when I am making diapers for my own baby, usually I forage all but the PUL from the thrift store. For high quality diaper fabrics, I highly recommend Kids in the Garden. They sell single cuts of PUL for diapers and most of their fabric is available by the inch.
* 20" x 15" piece of microfleece or any other soft lining fabric. I like microfleece because it keeps the moisture away from the baby's bum.
* One flat fold diaper or other absorbent fabric. You'll want something that keeps it's shape, as this is what you'll draw your pattern onto.
* 20" x 20" piece of flannel or PUL depending on whether you are making a fitted or AIO
* Some cardboard from a shipping or cereal box for tracing your pattern.
* Scissors, thread, etc.
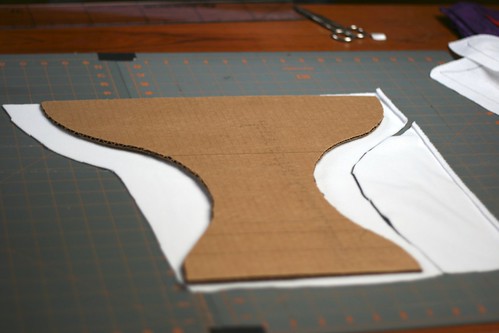
First, you need a pattern. Fern and Faerie 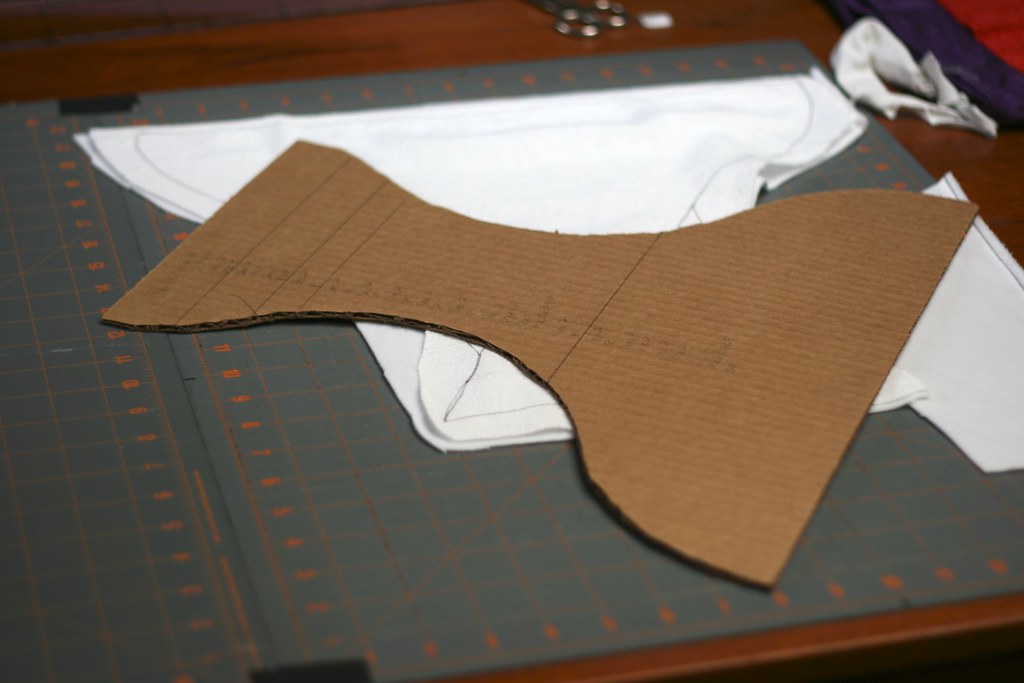 provides a nice pattern to start. The cardboard cutout I have is for contour diapers. I find that when you add the elastic for fitteds, you want some more room through the legs, otherwise the elastic can't handle the lining. So, I lose the hourglass shape through the legs and replace it with a straight line. provides a nice pattern to start. The cardboard cutout I have is for contour diapers. I find that when you add the elastic for fitteds, you want some more room through the legs, otherwise the elastic can't handle the lining. So, I lose the hourglass shape through the legs and replace it with a straight line. |
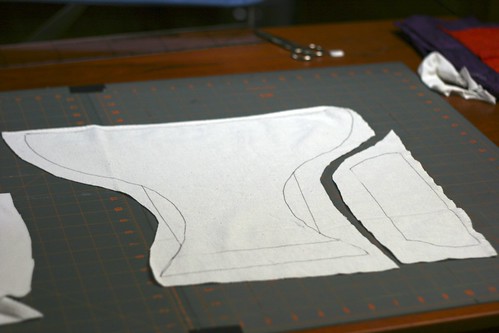 Make two lines at the top of your pattern. One should be about an inch and a half down and the other about two and a half inches. This will be where your stuffing pocket goes. Trace this pattern onto your absorbent layer, stopping at the top line you drew. Then trace the top portion (between the top and the second line). This bit should fit between the leg opening and the side of your material as you can see to the right. Cut these out roughly, making sure to leave a minimum half-inch seam allowance. Make two lines at the top of your pattern. One should be about an inch and a half down and the other about two and a half inches. This will be where your stuffing pocket goes. Trace this pattern onto your absorbent layer, stopping at the top line you drew. Then trace the top portion (between the top and the second line). This bit should fit between the leg opening and the side of your material as you can see to the right. Cut these out roughly, making sure to leave a minimum half-inch seam allowance. |
 For both pieces, you will want to trace the pocket opening onto the back of the material. This will provide your guide when you attach the absorbent material and the liner. For both pieces, you will want to trace the pocket opening onto the back of the material. This will provide your guide when you attach the absorbent material and the liner. |
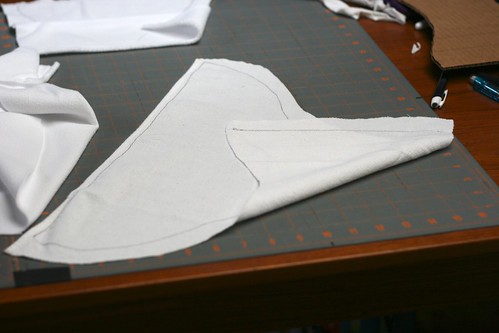
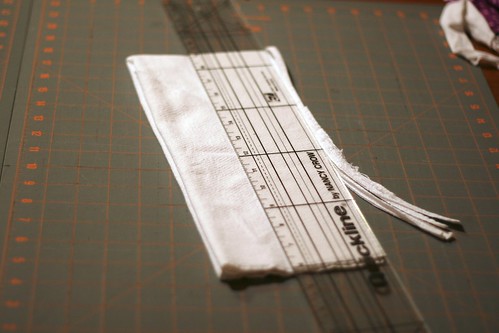
 Roughly cut out your microfleece the same way you cut your absorbent layer. Cut the flannel or PUL to the size of the whole diaper. Don't worry about precision, as long as you leave enough room. It is much easier and neater to do all of the trimming after everything is sewn together. Roughly cut out your microfleece the same way you cut your absorbent layer. Cut the flannel or PUL to the size of the whole diaper. Don't worry about precision, as long as you leave enough room. It is much easier and neater to do all of the trimming after everything is sewn together. |
   |
| Sew the right sides of your absorbent fabric and your microfleece together along the lines you traced onto the back of the absorbent layer. The right side of the absorbent layer is the side with the pattern traced on it. Trim the seams to one-quarter of an inch and fold the layers together so that the seam is hidden on the inside. |
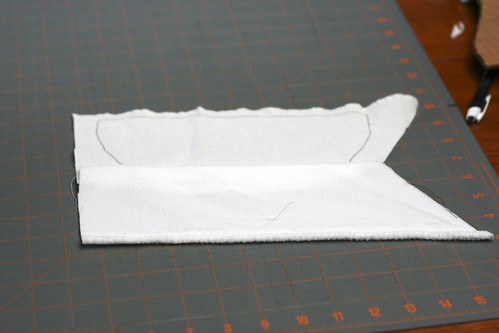
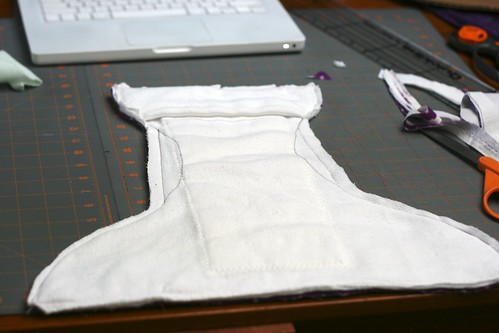
 Use the rest of your flat fold, or whatever found material you would like for a pad and cut it to fit into your diaper. I like there to be at least an inch of leeway on the legs and back in order for the elastic to work. T-shirts can work really well for this insert as well. If you want a pocket diaper you will skip this step. Use the rest of your flat fold, or whatever found material you would like for a pad and cut it to fit into your diaper. I like there to be at least an inch of leeway on the legs and back in order for the elastic to work. T-shirts can work really well for this insert as well. If you want a pocket diaper you will skip this step. |
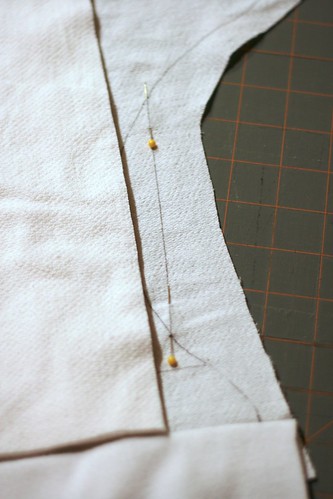 I carefully pin along the leg openings on both sides so that I can center the insert when I flip everything over. I carefully pin along the leg openings on both sides so that I can center the insert when I flip everything over. |
 Center the insert along the back and pin it into place. Note: You are only sewing the insert to the absorbent material. You don't want your stitches poking through the microfiber and annoying your baby. Center the insert along the back and pin it into place. Note: You are only sewing the insert to the absorbent material. You don't want your stitches poking through the microfiber and annoying your baby. |
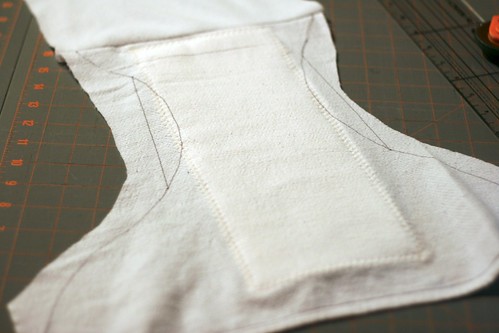 Sew it on with a zig-zag stitch that tries to catch the outside edge of the liner. This makes for a cleaner cut. I use my widest zig-zag, but set a pretty long stitch length. When you are done with this, fold the microfleece back down, so that the liner is hidden between the two layers. Sew it on with a zig-zag stitch that tries to catch the outside edge of the liner. This makes for a cleaner cut. I use my widest zig-zag, but set a pretty long stitch length. When you are done with this, fold the microfleece back down, so that the liner is hidden between the two layers. |
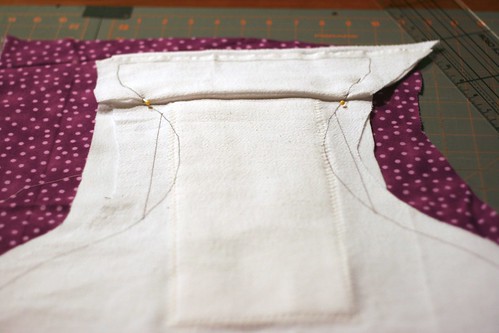 Line up your two pieces onto your flannel or PUL. You will want the microfleece to be next to the right side of your flannel or PUL if there is a right side.Whichever way your pocket looks like to you will be the opposite of the way it actually is when you turn it inside out. In the picture, I was playing with having my pocket open the opposite way of what you normally find. You will probably want the larger layer on top. You can also baste these two pieces together before attaching them to the outer if you find that simpler. Pin the pieces in place and sew around the entire diaper. Remember, you don't have to leave an opening to turn it inside out. The pocket takes care of that for you. Line up your two pieces onto your flannel or PUL. You will want the microfleece to be next to the right side of your flannel or PUL if there is a right side.Whichever way your pocket looks like to you will be the opposite of the way it actually is when you turn it inside out. In the picture, I was playing with having my pocket open the opposite way of what you normally find. You will probably want the larger layer on top. You can also baste these two pieces together before attaching them to the outer if you find that simpler. Pin the pieces in place and sew around the entire diaper. Remember, you don't have to leave an opening to turn it inside out. The pocket takes care of that for you. |
 Trim everything around the edges. I usually leave about half an inch in the place I will have elastic and trim it down to a quarter of an inch elsewhere. I usually leave about two inches on either side of the back free of elastic and then put elastic in the entire straight portion of the leg openings. I sew the elastic at full stretch right onto the left over seam allowances. Trim everything around the edges. I usually leave about half an inch in the place I will have elastic and trim it down to a quarter of an inch elsewhere. I usually leave about two inches on either side of the back free of elastic and then put elastic in the entire straight portion of the leg openings. I sew the elastic at full stretch right onto the left over seam allowances. |
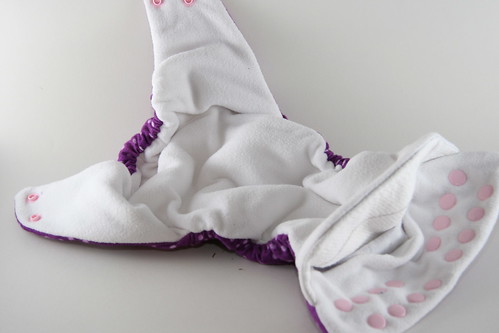 |
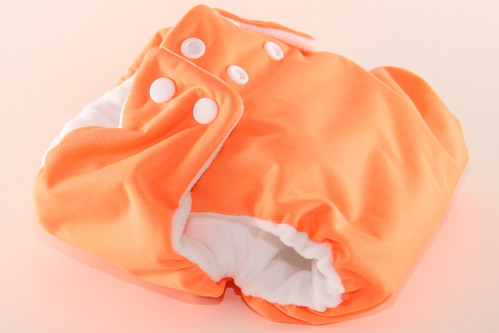
Add snaps or velcro and you have a finished diaper. Look at that pocket! |
| A couple of notes about AIOs: For a fitted, I normally stick to a five or six inch wide strip through the legs. This allows the diaper cover room to fit over the diaper. However for an AIO I like to bump i=this up to about seven. I also increase the amount of elastic I put in for the leg openings to make them more leak resistant. If you use microfleece on the inside, then you don't need to worry about it turning out a little when it is on the baby. Since it doesn't hold moisture, it won't leak. However if you use microfiber or flannel, you will need to be more careful and try to make the inside layer smaller than the outside, so that it will turn into the baby and not wick moisture outwards. I really recommend microfleece anyway, since it does a better job of keeping the baby's bum dry. |